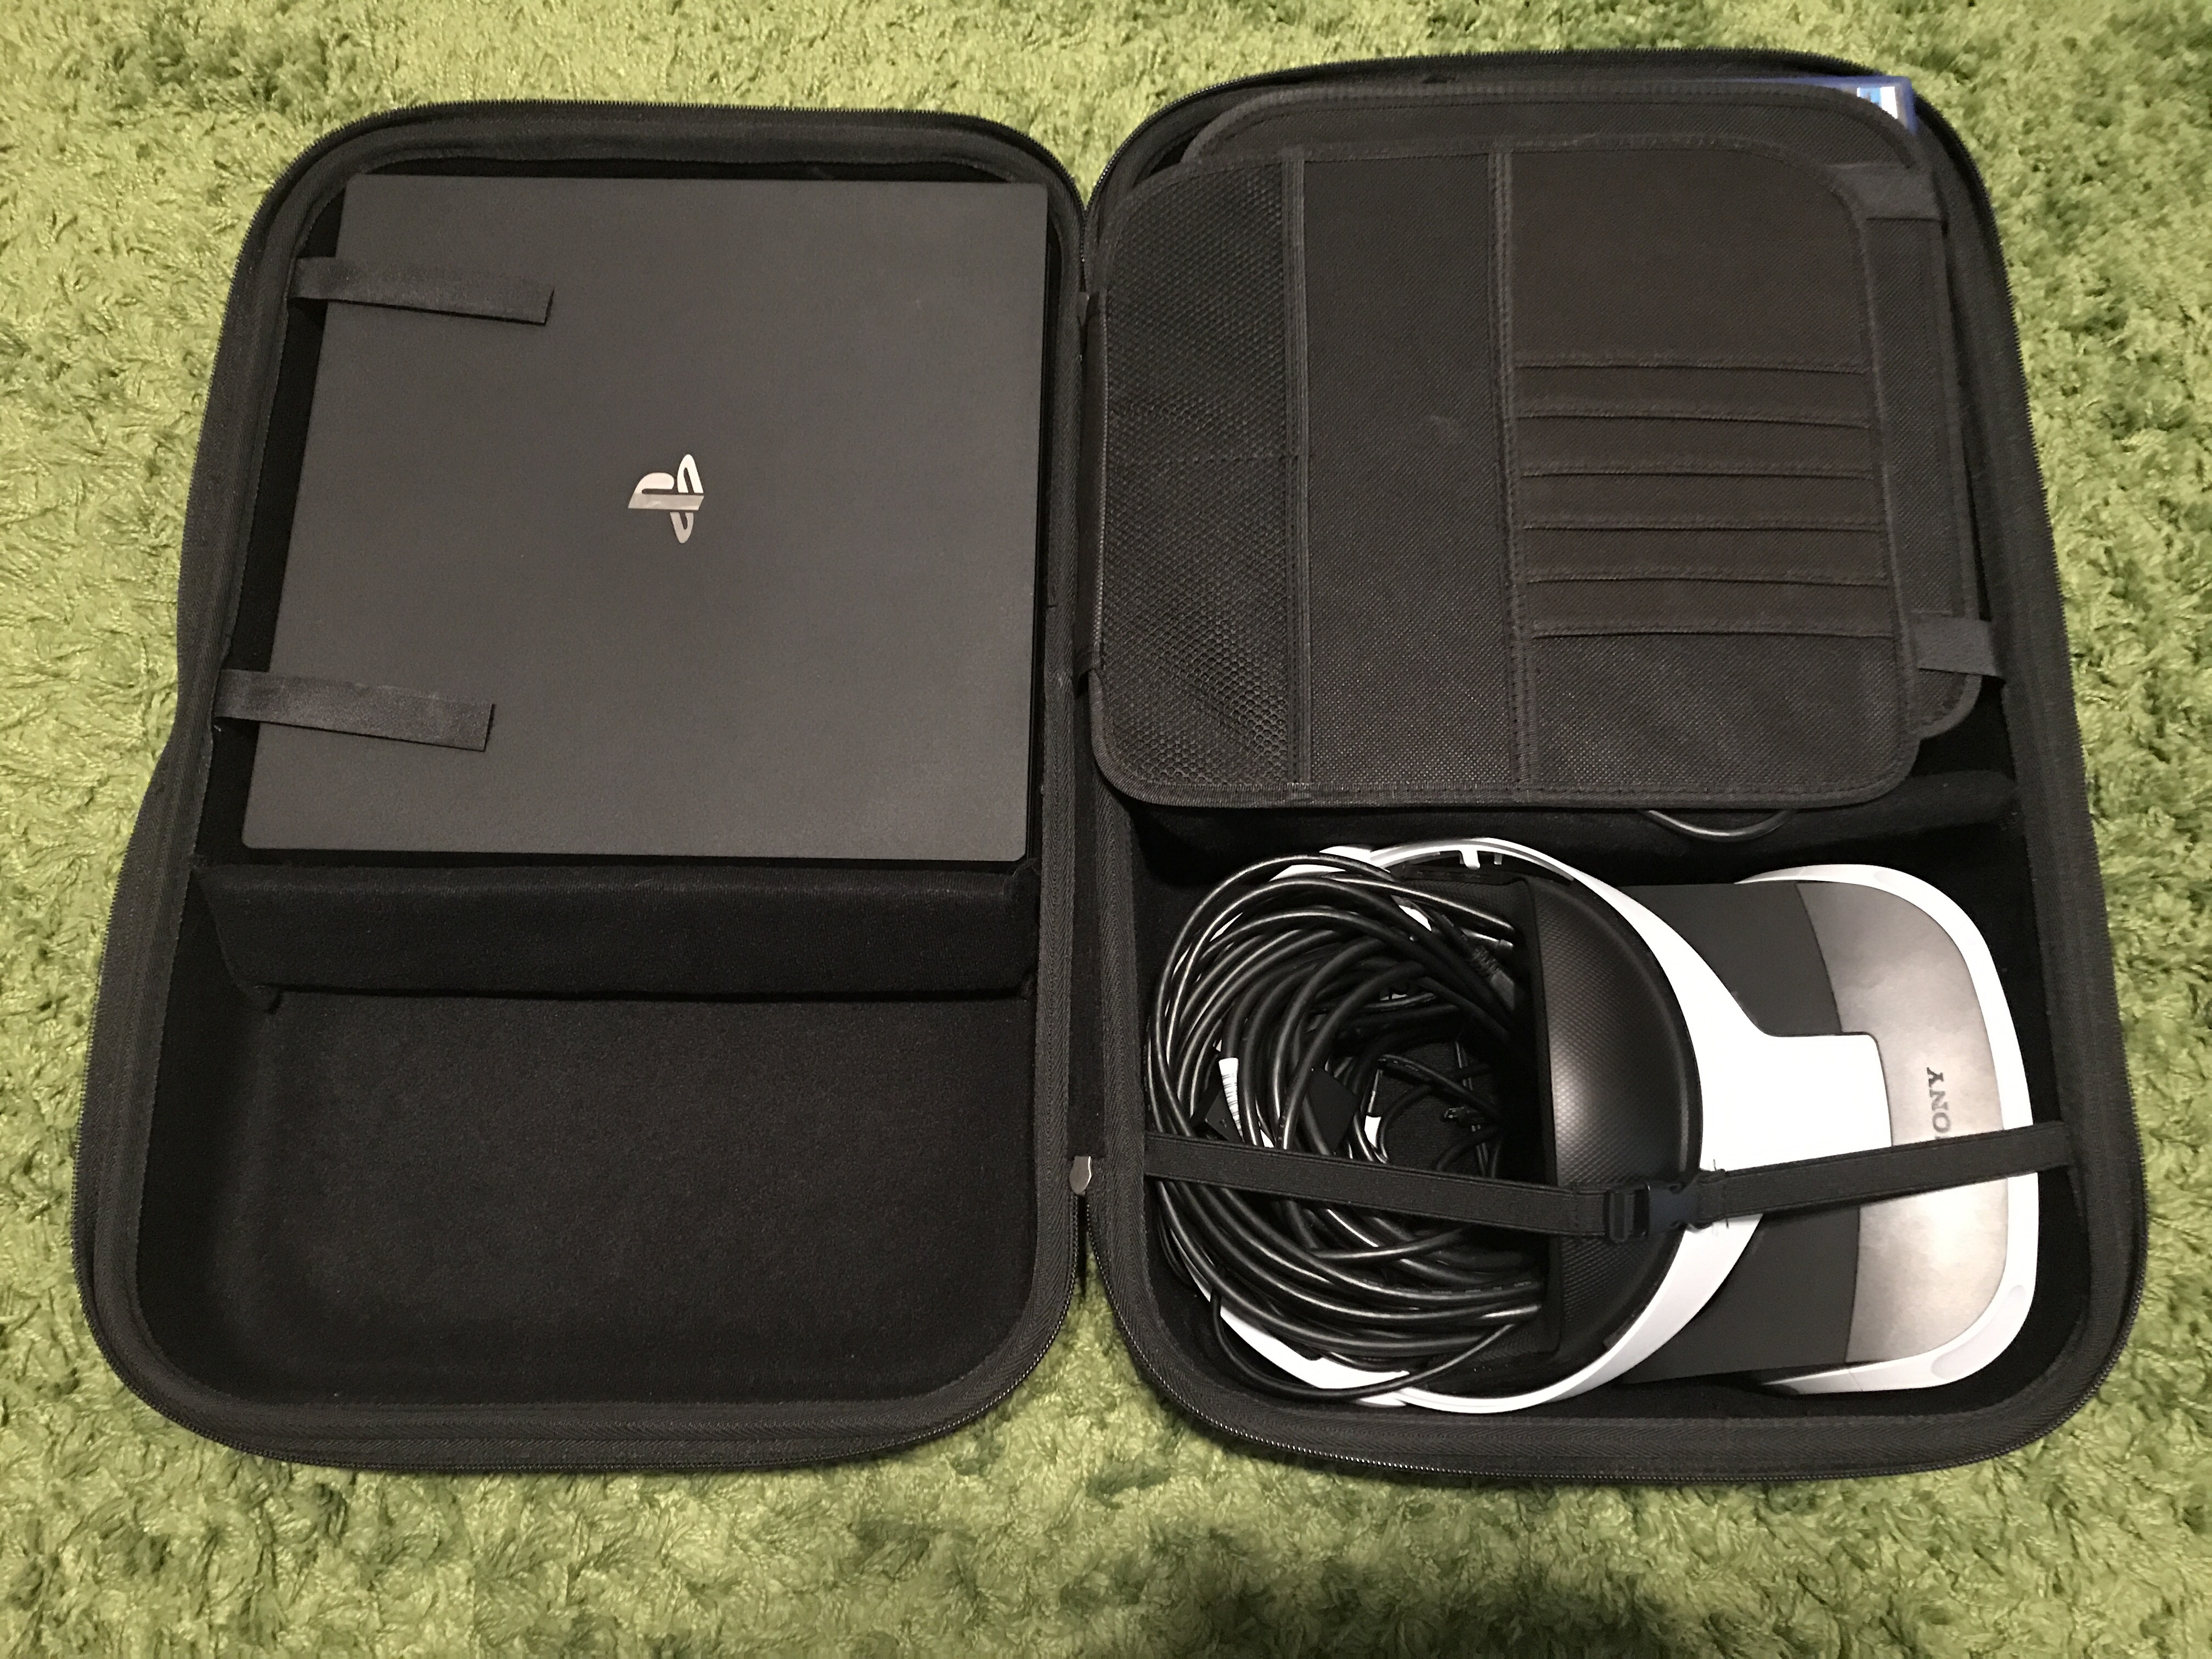
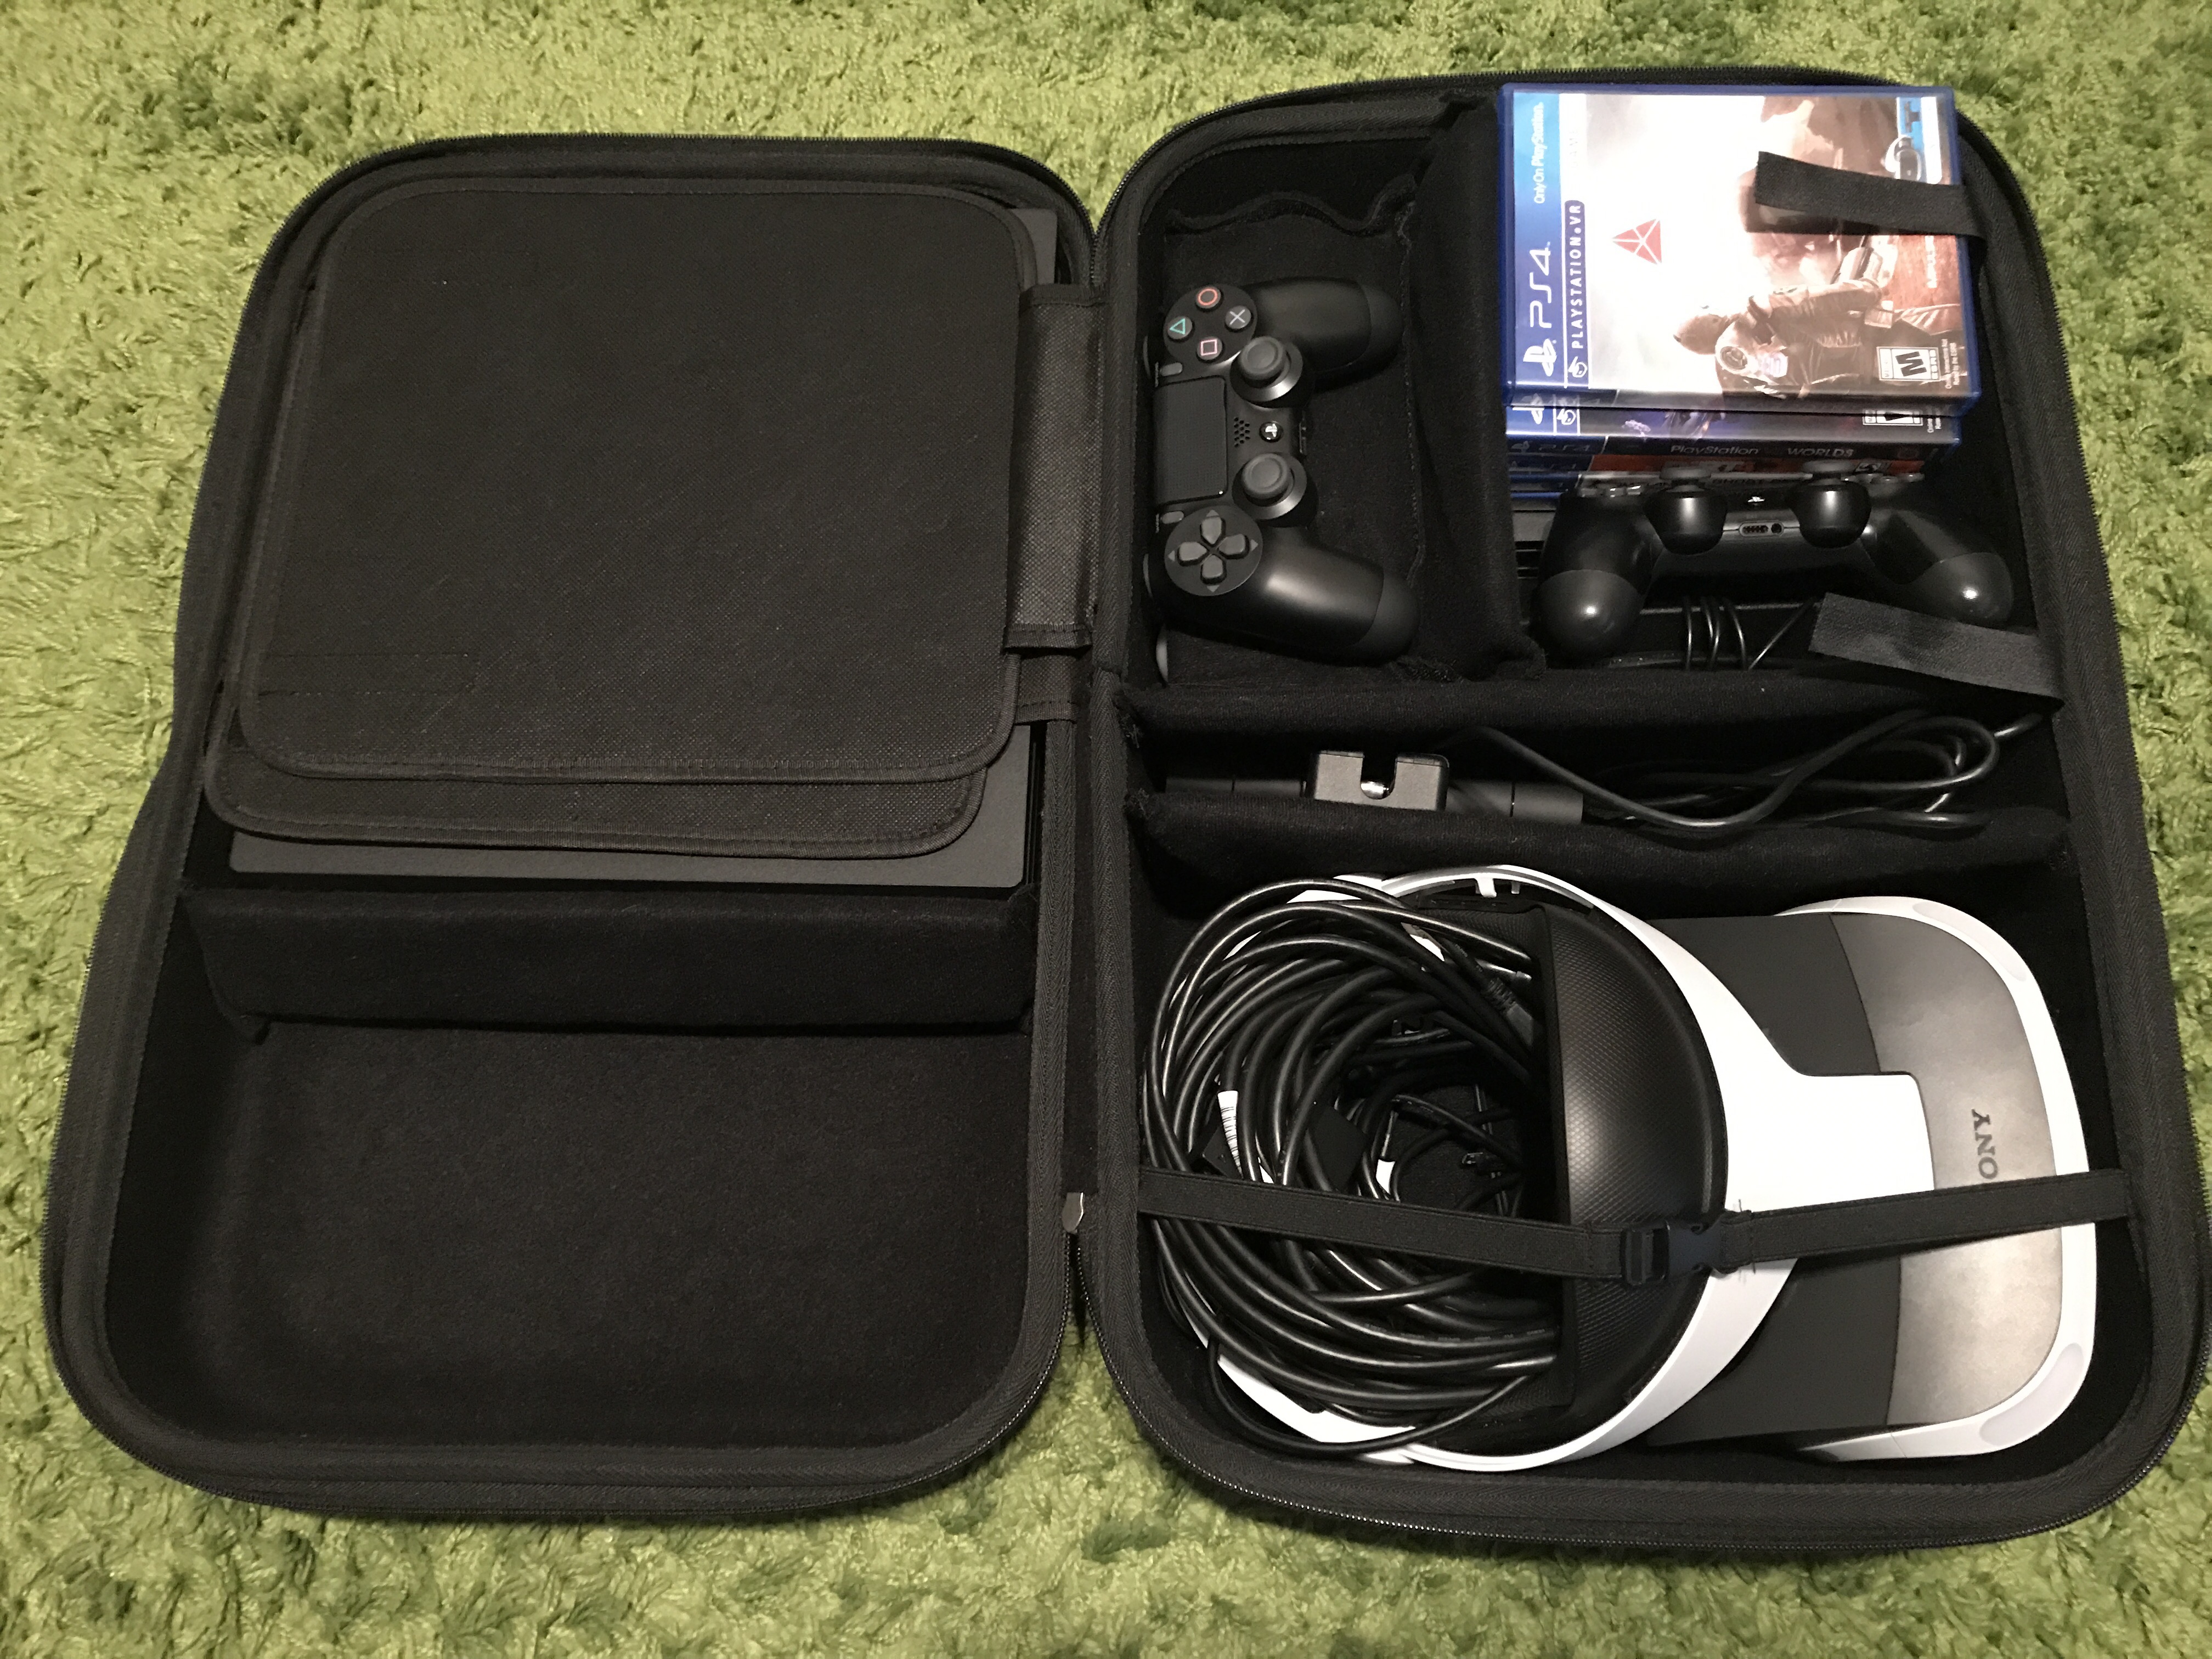
I need a few parts to make my cabinet complete.

  • 4 Green 30mm Buttons
  • 4 Pink 30mm Buttons
  • 2 Joysticks
  • Stereo Audio Amp
  • 2 Seimitsu S-Plate

A list of Sega Dreamcast SHMUPS that can be rotated from a menu option.

Make sure you have a memory card or a VMU in your controller so you can save your tate option.


Gunbird 2
VGA Supported: Yes (Issues?)
Multi Player: No
Rotate Instructions:
Gameplay Video: Youtube 


Ikaruga
VGA Supported: Yes
Multi Player: Yes
Rotate Instructions:
Gameplay Video: Youtube

Karous
VGA Supported: Yes
Multi Player: Yes
Rotate Instructions:
Gameplay Video: Youtube

Psyvariar II
VGA Supported: Yes
Multi Player: Yes
Rotate Instructions:
Gameplay Video: Youtube

Radilgy
VGA Supported: Yes
Multi Player: Yes
Rotate Instructions:
Gameplay Video: Youtube

Shikigami no Shiro II
VGA Supported: Yes
Multi Player: Yes
Rotate Instructions:
Gameplay Video: Youtube

Triggerheart Exelica
VGA Supported: Yes
Multi Player: Yes
Rotate Instructions:
Gameplay Video: Youtube

Trizeal
VGA Supported: Yes
Multi Player: Yes
Rotate Instructions:
Gameplay Video: Youtube

Under Defeat
VGA
Supported 2 Player Mode
Gameplay Video: Youtube


I had a few spare Sega Dreamcasts around and decided it would be a good system to stick in my Sega Astro City due to the tate (vertical) games.

Needed:

  • 1 Sega Dreamcast
  • 2 Sega Dreamcast controllers
  • 1 JAMMA Fingerboard
  • 1 Sega Dreamcast to VGA adapter

I kind of lucked out since the VGA adapter I have is compatible to an easy hack to make it output 15khz for my M9 arcade monitor.

Here is the link for the Dreamcast VGA Adapter mod.

I was only going to use this VGA adapter for the Astro City so I decided not to install a switch to go back to 31khz. I just cut pin 6 (blue wire on my adapter) so it forces 16khz. You could just add a switch inline with pin 6 and then you can switch between 16khz and 31khz. This is handy if you want to use the adapter on a LCD TV also, which I do not recommend since the Sega Dreamcast does not look that great on a LCD.

To start this project off I call on a friend, Adam, to help out with the cabinet and to kill some beer. he was successful with both tasks. We wanted to do a quick “proof of concept” and just get the video working to see how it looked.

  • I took the Dreamcast VGA converted and cut pin 6.
  • Took a VGA  cable and cut one end off so I can soldier it to the JAMMA fingerboard.

More to come…

Wanted to start this project and I need to make a few notes on the subject. First let me get the parts list out of the way.

1 Sega Saturn
2 Sega Saturn controllers

Circuit for getting Composite Sync:

1 JAMMA Fingerbord
1 8 pin chip socket
1 LM1881N
2 0.1uf Capacitors
1 680K ohm resistor

I am currently working on a Sega Astro City cab. This is my first Japanese candy cab and I will be restoring it to keep in my personal collection. This is a “running” list of things I will need to get this machine up and running or looking clean.

The cab is in working order and the 29″ monitor looks great. So I won’t have to worry about that… thank God.

Parts Needed:

  • New or cleaned up JAMMA harness
  • 8″ 15 watt florescent tube for marquee light
  • Astro City auxiliary harness
  • Coin Acceptor
  • Marquee holder